
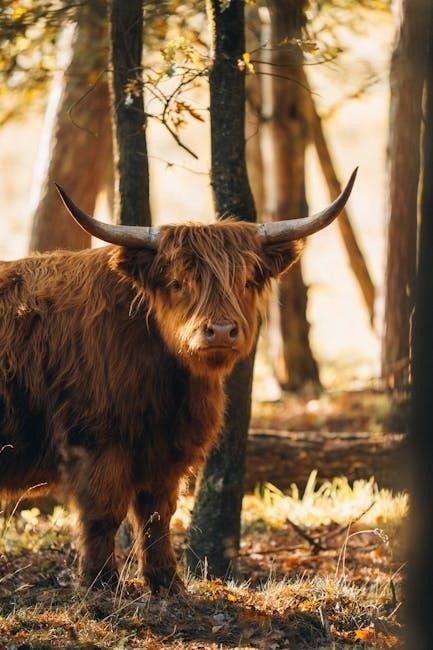
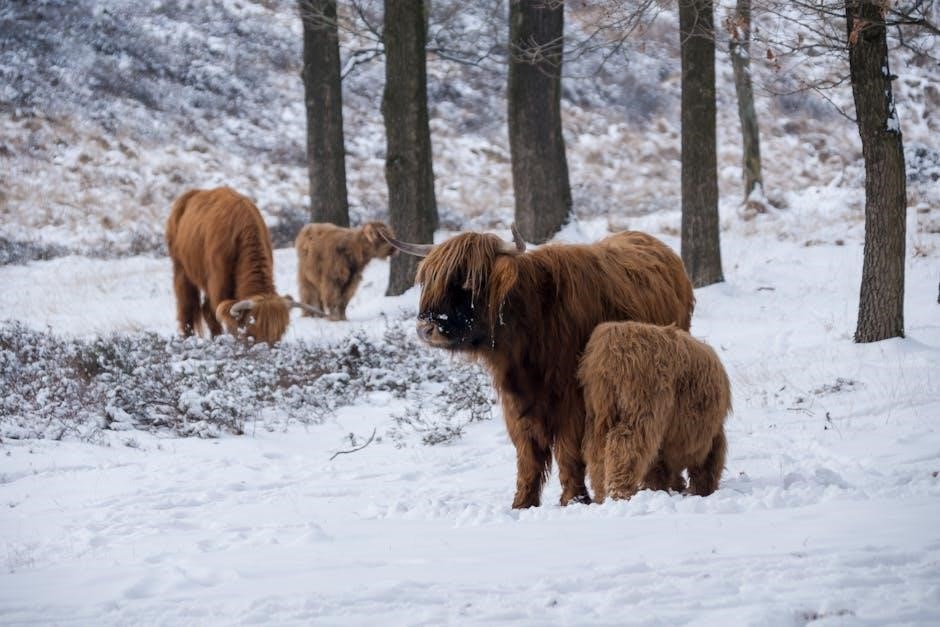
Introducing the Highland Cow Crochet Pattern, a delightful way to create a charming and cuddly Amigurumi toy. Perfect for all skill levels, this pattern brings a touch of Scottish charm to your home decor, offering a fun and rewarding project for crochet enthusiasts.
Benefits of Using a Free PDF Pattern
Using a free PDF pattern for the Highland Cow crochet project offers numerous advantages. It provides a convenient, downloadable format that can be accessed anytime and anywhere. The PDF is often ad-free, ensuring an uninterrupted crafting experience. Detailed instructions and step-by-step guides are typically included, making it easier for crafters of all skill levels to follow along. Many free PDF patterns also include photo tutorials, which are invaluable for visual learners. Additionally, the ability to print only the necessary pages helps reduce waste. These patterns are cost-effective, allowing crafters to allocate more resources to materials. Overall, a free PDF pattern is a practical and accessible way to bring your Highland Cow crochet project to life.
Materials and Supplies Needed
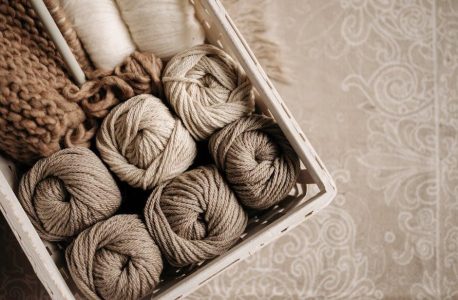
- Worsted weight yarn in various colors
- DK yarn for details (light beige, black, brown)
- Crochet hook (size smaller than yarn recommendation)
- Stuffing material
- Scissors, tapestry needle, and yarn needle
3.1. Yarn Types and Colors
For the Highland Cow Crochet Pattern, choose worsted weight yarn for a classic look or experiment with other yarns. Use light beige for the mouth and horns, black for hooves, and brown for the body. DK yarn works well for details. The pattern is versatile, allowing any yarn type, but worsted weight is recommended for a tight fabric. Select colors that resemble the natural Highland cow appearance, with shades of brown, beige, and black. Ensure contrast for details like eyes and horns. Yarn choice and color selection will bring your Highland Cow to life, making it a unique and charming creation.
3.2. Crochet Hook Sizes
The Highland Cow Crochet Pattern recommends using a crochet hook size that matches your chosen yarn weight. A 3.5mm or 4mm hook is ideal for worsted weight yarn, ensuring a snug fabric. Use a hook smaller than the yarn’s recommended size for a tighter stitch, perfect for amigurumi toys. Hook size affects the finished size and texture, so consistency is key. For smaller cows, try a 3mm hook, while a 4.5mm hook works for larger versions. Adjust the hook size to achieve the desired texture and ensure all parts are crocheted evenly. Proper hook size ensures your Highland Cow turns out cuddly and well-shaped, ready for assembly and stuffing.
3.3. Stuffing Material
The Highland Cow Crochet Pattern requires high-quality stuffing material to create a soft, cuddly texture. Fiberfill is the most commonly recommended stuffing due to its ability to hold shape and provide a plush feel. When stuffing, ensure the material is evenly distributed to maintain the cow’s natural appearance. Over-stuffing can make the toy stiff, while under-stuffing may result in a flat shape. For a more eco-friendly option, consider using recycled polyester fiberfill. Stuffing tools can help you fill tight spaces, like the legs and ears, without stretching the stitches. Proper stuffing ensures your Highland Cow is both durable and adorable, ready for snuggling or display.
3.4. Other Essential Supplies
Beyond yarn and hooks, several other supplies are crucial for creating your Highland Cow. A tapestry needle is necessary for weaving in ends and sewing body parts together. Stuffing tools, like a stuffing fork or chopstick, help fill tight spaces without stretching stitches. Black embroidery floss or yarn is used for the eyes and nostrils, adding character to your cow. Scissors are essential for cutting yarn neatly. Optional supplies include stitch markers for tracking patterns and a measuring tape to ensure accurate sizing. These tools will help you craft a well-made, detailed Highland Cow that’s both charming and professional-looking, perfect for gifting or personal enjoyment.
Understanding the Pattern
The Highland Cow Crochet Pattern is designed for all skill levels, offering clear instructions and a structured layout. It includes detailed step-by-step guides and photos to ensure easy comprehension and successful completion of the project.
4.1. Skill Level Required
The Highland Cow Crochet Pattern is suitable for crafters of all skill levels, from beginners to experienced crocheters. The pattern includes clear instructions and photos, making it accessible to those new to amigurumi. Basic knowledge of crochet stitches is necessary, but the pattern’s simplicity ensures that even novices can achieve professional-looking results. Advanced crocheters will appreciate the detailed guidance for shaping and assembly. The pattern’s versatility allows it to be adapted to different skill levels, ensuring a fun and rewarding experience for everyone. This makes it an ideal project for skill-building or for creating charming gifts for loved ones.
4.2. Pattern Layout and Structure
The Highland Cow Crochet Pattern is thoughtfully organized to ensure a seamless crafting experience. It begins with a clear list of materials and supplies, followed by detailed step-by-step instructions. The pattern is divided into logical sections, such as body, head, ears, and horns, making it easy to follow. Photo tutorials and visual guides are included to clarify complex steps, while appendices provide additional resources like stitch guides and troubleshooting tips. The layout is user-friendly, with bold headings and numbered lists to enhance readability. This structured approach allows crocheters to focus on creating without confusion, ensuring a fun and successful project completion.
Step-by-Step Crochet Guide
This guide offers a comprehensive walkthrough, from crocheting the body to shaping the horns, ensuring clarity with detailed instructions and photo tutorials for each part of the Highland Cow.
5.1. Crocheting the Body
Begin by creating a magic ring and crocheting the initial rounds to form the base of the Highland Cow’s body. Using worsted weight yarn and a size J (6.0mm) crochet hook, start with single crochet stitches to build the foundation. Gradually increase stitches in each round to shape the body into a seamless, rounded form. Continue crocheting until the body reaches the desired size, ensuring tight stitches for a firm structure. Use a stitch marker to keep track of the beginning of each round. Once completed, fasten off, leaving a long tail for sewing. This step sets the base for assembling the cow’s other features, like the head and legs, ensuring a sturdy and cuddly finish.
5.2. Creating the Feet
To create the Highland Cow’s feet, start by making a magic ring and crocheting a few rounds of single crochet stitches to form the base. Gradually increase the number of stitches to shape the foot into a small, rounded oval. Use a stitch marker to keep track of the first stitch of each round. Continue crocheting until the foot reaches the desired size, ensuring the fabric is tight and even. Fasten off, leaving a long tail for sewing. Repeat this process to create four feet, making sure they are identical in size and shape. These will be sewn to the bottom of the body later, providing stability and a lifelike appearance to your Highland Cow.
5.3. Shaping the Head
Begin by crocheting a magic ring and working several rounds of single crochet stitches to create the head’s base. Gradually increase the number of stitches to form a rounded shape, using a stitch marker to track the first stitch of each round. Once the head reaches the desired size, fasten off and leave a long tail for sewing. Use black yarn to embroider the eyes, ensuring they are evenly spaced for a lifelike appearance. The ears and horns, crocheted separately, are then sewn onto the top of the head. This step requires attention to detail to achieve the Highland Cow’s distinctive facial features, making it a key part of the pattern.
5.4. Crafting the Ears
Crafting the ears involves crocheting small, triangular shapes that mimic the Highland Cow’s distinctive features. Begin by creating a magic ring and working a few rounds of single crochet stitches to form the ear’s base. Use a smaller hook size to ensure a tight fabric. Gradually decrease the number of stitches to shape the ear into a pointed tip. Fasten off and leave a tail for sewing. The ears are typically small and quick to crochet, requiring minimal yarn. Once complete, sew them securely to the top of the head, positioning them slightly apart for an authentic look. This step adds character to your Highland Cow, making it uniquely recognizable.
5.5. Forming the Horns
Forming the horns is a simple yet essential step in creating your Highland Cow crochet project. Begin by crocheting small, cone-shaped structures using light beige or brown yarn to match the natural color of the horns. Start with a magic ring and work a few rounds of single crochet stitches, gradually increasing the number of stitches to shape the horn. No special stitches are required, making this step accessible to all skill levels. Once crocheted, use a tapestry needle to weave in the ends. To add stability, you can insert a small piece of wire or a toothpick into the horn before sewing it securely to the head, ensuring it stands upright. This detail adds authenticity to your Highland Cow’s appearance.
5.6. Adding the Tail
Adding the tail to your Highland Cow crochet project is a simple yet important step to complete its charming appearance. Use leftover yarn in the same color as the body or a contrasting shade for a unique look. Crochet a small, rounded shape or a slim, elongated tail, depending on your preference. Start with a magic ring and work a few rounds of single crochet stitches until the tail reaches your desired length. Fasten off and leave a long tail for sewing. Attach the tail to the back of the cow, just above the hind legs, using a tapestry needle. Ensure it is securely sewn to withstand handling. This small detail completes your Highland Cow, giving it a lifelike and adorable finish.
Assembly and Stuffing
Assembly and stuffing are crucial steps in bringing your Highland Cow crochet project to life. Begin by gathering all crocheted components, including the body, head, ears, horns, and tail. Use polyester fiberfill to stuff each part firmly, ensuring the body is well-padded for a plush appearance. Be careful not to overstuff, especially the head and ears, to maintain their shape. Once stuffed, sew the head securely to the body using a tapestry needle and yarn, positioning it evenly. Attach the ears to the top of the head and the horns slightly below. Finally, sew the tail to the back of the body, just above the hind legs. This step completes your Highland Cow, giving it a cuddly and lifelike form.
Customization Tips
Personalize your Highland Cow by changing colors or yarn types. Add unique details like patches, ribbons, or embroidery to create a one-of-a-kind piece.
7.1. Changing Colors
Changing colors allows you to personalize your Highland Cow crochet project. Choose a palette that reflects the natural hues of the breed, such as shades of brown, black, and cream. For a unique look, experiment with vibrant colors or pastel tones. Consider using worsted-weight yarn for a soft, cozy texture. DK yarn is also suitable, with light beige for the mouth and horns, black for hoofs, and brown for the body. To ensure a seamless transition between colors, crochet the body in one piece or use the join-as-you-go method. This customization tip lets you create a Highland Cow that matches your personal style or complements your home decor.
7.2. Adjusting Sizes
Adjusting sizes for your Highland Cow crochet project is straightforward. Use worsted-weight yarn for a standard-sized cow or opt for bulky yarn to create a larger version. For a smaller cow, choose a finer yarn with a smaller hook. The pattern is versatile, allowing you to customize the size to suit your preferences. To maintain the toy’s shape, ensure the fabric is tight by using a hook smaller than the yarn’s recommended size. This technique prevents the stuffing from showing through. Whether you prefer a compact decoration or a large, cuddly companion, the Highland Cow pattern accommodates your vision. Experiment with different yarn weights and hook sizes to achieve the desired proportions for your project.
7.3. Adding Details
Adding details to your Highland Cow crochet project can elevate its charm and personality. Use yarn or embroidery floss to create expressive eyes and a nose. For horns, crochet small cones and attach them securely. Add texture by stitching fur details using a contrasting yarn color. Consider adding a tail for a more realistic look. To enhance the Highland Cow’s iconic appearance, incorporate spots using fabric paint or stitched yarn. Personalize your cow by adding a ribbon or bow around the neck. These small touches make your Highland Cow unique and give it a personalized finish. Experiment with different embellishments to match your desired style, ensuring your cow stands out as a one-of-a-kind creation.
Photo Tutorials and Visual Guides
Photo tutorials and visual guides are invaluable for bringing your Highland Cow crochet project to life. Many free PDF patterns include step-by-step images to help you understand complex stitches or assembly. These visuals often highlight key details, such as how to shape the head, attach the horns, or sew the body parts together. Close-up photos of stitches and techniques ensure clarity, making it easier to follow along. Additionally, many creators share supplementary photo guides online, offering before-and-after shots of specific steps. These resources are especially helpful for beginners or those new to amigurumi crochet. By referencing these visuals, you can ensure your Highland Cow turns out adorable and well-crafted, with professional-looking results.
Troubleshooting Common Mistakes
When working on your Highland Cow crochet project, common mistakes can include miscounting stitches, uneven shaping, or improper assembly. To avoid these, ensure you follow the pattern closely and double-check your stitch counts. If your cow’s body or head appears misshapen, it may be due to inconsistent tension or using the wrong hook size. Refer to the pattern’s photo tutorials for guidance on shaping and assembly. For loose fabric, try using a smaller hook to achieve a tighter stitch. If you encounter issues with sewing parts together, use a tapestry needle and matching yarn for a seamless finish; Many free PDF patterns also include troubleshooting tips to help you correct common errors and achieve a professional result.
Time and Difficulty Level
Crocheting a Highland Cow is a rewarding project suitable for crafters of various skill levels. The pattern is categorized as intermediate, requiring basic knowledge of amigurumi techniques. Completion time varies, but most crafters finish within 10-15 hours, depending on experience. The project involves creating multiple components—body, head, ears, horns, and tail—each with specific shaping requirements. Beginners may need to practice stitches like the magic ring or invisible decrease. Advanced crocheters can complete it quickly, while those new to amigurumi may need to allocate extra time to master the techniques. Free PDF patterns often include tips to simplify the process, ensuring a smooth and enjoyable crafting experience for everyone. This project is ideal for those looking to challenge themselves or create a unique gift. With patience, you’ll have a charming Highland Cow to treasure.
Uses for the Finished Highland Cow
Your completed Highland Cow crochet project offers numerous creative and practical uses. It makes an adorable plush toy for children, providing comfort and imaginative play. Home decorators can use it as a charming rustic accent, adding Scottish charm to living spaces. Craft fairs and markets often feature these cows as popular items, appealing to lovers of handmade goods. They also serve as heartfelt gifts for friends and family, especially those fond of animals or Scotland. Additionally, the Highland Cow can be a personalized keepsake, representing a connection to heritage or a beloved pet. Its versatility ensures it brings joy in various settings, whether as a decorative piece or a cherished companion. This project truly becomes a meaningful creation with endless possibilities;
The Highland Cow Crochet Pattern is a delightful and rewarding project for crafters of all levels. With its charming design and step-by-step instructions, it offers a fun way to create a unique piece. Whether for personal enjoyment, as a gift, or home decor, this pattern delivers a sense of accomplishment. The finished cow brings joy and a touch of rustic charm, making it a treasured creation. Embrace the opportunity to craft something meaningful and enjoy the process of bringing this adorable Highland Cow to life. Happy crocheting and cherish your handmade masterpiece! Your Highland Cow is sure to delight everyone who sees it.
Resources and Further Reading
For further exploration and inspiration, numerous online resources offer free PDF patterns and guides for creating Highland Cow crochet projects. Websites like Pinterest, Etsy, and Ravelry provide a wealth of free and paid patterns, along with photo tutorials and tips. Crochet communities on social media platforms such as Facebook and Instagram are excellent for connecting with fellow crafters, sharing ideas, and learning new techniques. Additionally, blogs dedicated to Amigurumi crochet often feature detailed step-by-step guides and troubleshooting tips. These resources are invaluable for both beginners and experienced crocheters looking to expand their skills or explore variations of the Highland Cow pattern. Happy crafting!
Community and Sharing Your Work
The crochet community is a vibrant and supportive space where crafters share their creations and inspire others. Platforms like Instagram, Pinterest, and Facebook groups are perfect for showcasing your Highland Cow projects. Many crocheters enjoy sharing photos of their finished pieces, often accompanied by tips and stories of their creative journey. These communities also provide valuable feedback and encouragement, helping you refine your skills. If you’re proud of your Highland Cow, consider sharing it online or at local craft fairs. Seeing others’ work can also spark new ideas and motivate you to try different variations or patterns. Joining these communities is a great way to connect with fellow crochet enthusiasts and celebrate your handmade creations together.
Frequently Asked Questions (FAQs)
Here are some common questions about the Highland Cow Crochet Pattern:
- What yarn is best for this pattern? Use medium-weight yarn like worsted or DK for a sturdy finish.
- Can I adjust the size? Yes, adjust hook size or yarn weight to customize the cow’s size.
- What if I’m a beginner? This pattern is suitable for all skill levels, with clear step-by-step instructions.
- Do I need special stitches? No, basic crochet stitches are sufficient for this project.
- How long does it take to complete? It varies, but most crafters finish in a few days to a week.
- Can I sell my finished cow? Yes, many crafters sell their Highland Cows at fairs or online.
These FAQs address common concerns, ensuring a smooth and enjoyable crocheting experience.
History and Cultural Significance of Highland Cows
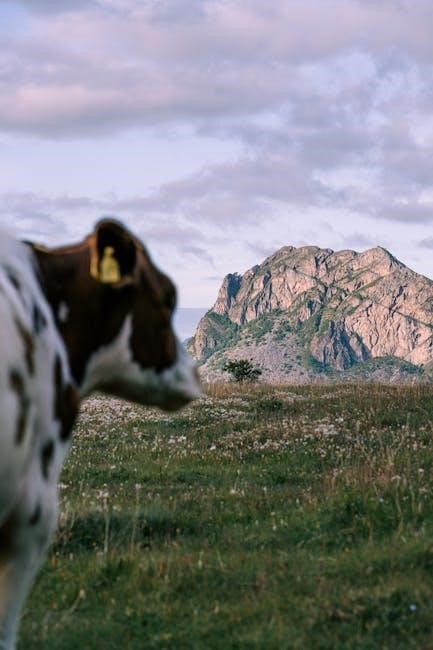
Highland cows, originating from Scotland, are an ancient and iconic breed known for their distinctive shaggy coats and resilience to harsh climates. These animals have deep cultural significance, symbolizing strength and adaptability. In Scottish folklore, they are often depicted as symbols of the rugged Highlands. Their role in agriculture dates back centuries, providing beef and milk for local communities. Today, they are celebrated as a national symbol of Scotland, appearing in art, literature, and even crochet patterns. Crafting a Highland cow connects you to this rich heritage, making it a meaningful project for anyone who appreciates history and cultural traditions.
Tips for Beginners
Starting your Highland Cow crochet project? Begin with the right materials and tools. Choose a medium-weight yarn and a hook size that suits your yarn for a neat finish. Start with the feet and body, as they provide a solid foundation. Use photo tutorials for visual guidance, especially for shaping the head and horns. Keep tension consistent to avoid loose stitches. Mark increases and decreases with stitch markers for clarity. Follow the pattern step-by-step, and don’t rush—patience yields the best results. Practice basic stitches beforehand if you’re new to crochet. These tips will help you create a charming Highland Cow with ease and confidence.
Yarn Substitutes and Alternatives
While the Highland Cow Crochet Pattern recommends specific yarns, you can experiment with substitutes to achieve a unique look. Worsted weight yarn is ideal, but chunky or DK yarns work well for larger or smaller cows. Acrylic, cotton, or blends are great options for durability and softness. Natural fibers like wool add warmth, while synthetic blends offer easy care. For a rustic feel, try tweed or heathered yarns. If the original pattern calls for light beige, brown, and black, consider substitutes like cream, taupe, or dark gray for a similar aesthetic. Always adjust the hook size to ensure a tight fabric, and feel free to mix colors for a personalized touch.
Gifting Ideas and Presentation
Your Highland Cow crochet project makes a thoughtful gift for loved ones. Consider gifting it as a cuddly companion for children or a rustic decoration for home. For a personalized touch, pair the cow with a handwritten note or a small plant. If giving as a gift, package it in a charming box or bag with a ribbon. You can also add themed items like Scottish-themed accessories or a packet of shortbread cookies. The Highland Cow’s unique design ensures it stands out as a heartfelt and creative present. Its soft, cuddly texture and adorable appearance make it a perfect gift for any occasion, spreading joy and warmth to the recipient.
Variations and Different Sizes
The Highland Cow crochet pattern offers flexibility, allowing crafters to experiment with various sizes and designs. By adjusting yarn weight and hook size, you can create everything from miniature charms to large, cuddly companions. Some patterns include options for three different sizes, ensuring versatility for any project. Additionally, you can customize the cow’s appearance by altering colors, adding accessories, or modifying features like horns or ears. Seasonal variations, such as holiday-themed Highland Cows, can also be created with minimal pattern adjustments. This adaptability makes the Highland Cow pattern a versatile choice for crafters looking to personalize their creations or produce a unique collection of designs.
Maintenance Tips for Your Crochet Cow
To keep your Highland Cow crochet creation looking its best, regular maintenance is key. Avoid exposure to direct sunlight to prevent fading and use a soft brush to gently remove dust. For cleaning, spot clean with a damp cloth, avoiding harsh chemicals or machine washing. Store the cow in a dry, cool place to prevent moisture damage. Handle with care to maintain the shape, especially if the cow is stuffed tightly. For added protection, consider using a fabric protector spray to repel stains and dust. These simple tips will ensure your Highland Cow remains a charming and durable companion for years to come.
Avoiding Common Mistakes
When crocheting your Highland Cow, there are a few common mistakes to watch out for. First, ensure you use the correct yarn weight and hook size specified in the pattern to maintain the desired texture and size. Overstuffing the body can make the cow look misshapen, so stuff firmly but gently. Avoid tight stitches, as they can cause the fabric to pucker; instead, crochet evenly and relaxed. Pay attention to pattern instructions, especially for shaping the head and horns, as misalignment can affect the overall appearance. Lastly, double-check your stitch count regularly to prevent mismatches. By being mindful of these potential pitfalls, you’ll achieve a well-crafted and adorable Highland Cow. Proper attention to detail ensures a professional finish.
Final Thoughts and Encouragement
Congratulations on completing the Highland Cow Crochet Pattern! This project is a true testament to your creativity and patience. Whether you’re a seasoned crafter or a beginner, the sense of accomplishment you’ll feel when holding your finished Highland Cow is incredibly rewarding. Don’t hesitate to share your creation online or with friends—seeing your work admired can be a great motivator. Remember, crochet is a skill that grows with practice, and every project brings you closer to mastering new techniques. Embrace the joy of creating something unique and handmade, and take pride in the love and effort you’ve stitched into every detail. Happy crocheting!